RubyCocoa is a framework for the development of Mac OS X applications.
By means of RubyCocoa you can:
In the case of Tiger download and install the newest dmg from the url below:
In Leopard there is no need for installation because RubyCocoa is already included in the OS.
Let us try putting together an application.
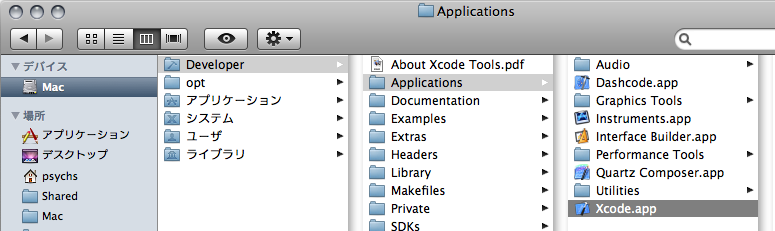
First, let's boot up XCode. (/Developer/Applications/Xcode.app)
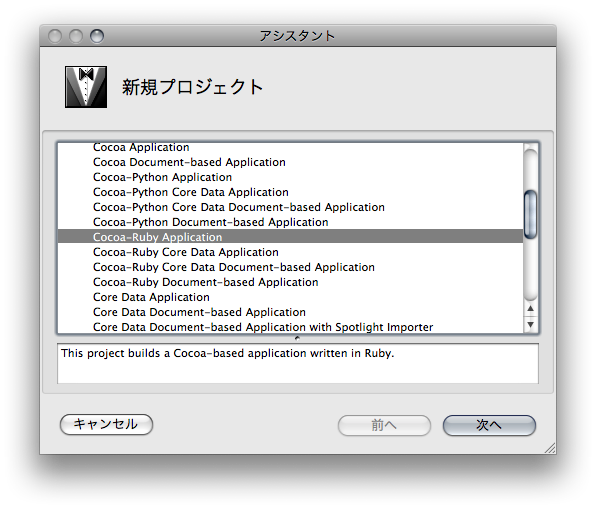
After you boot XCode up choose File→New Project...
In the new project dialog that appears, under the "Application" section choose "Cocoa-Ruby Application"
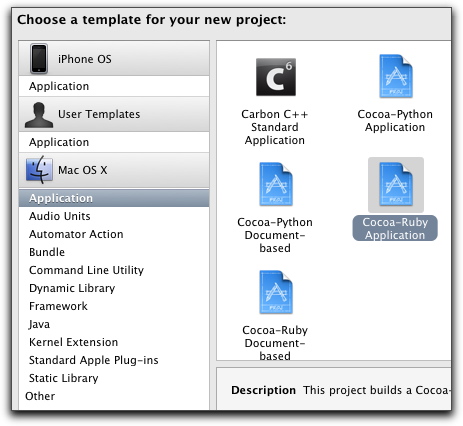
If you are using a newer version of XCode you may choose "Cocoa-Ruby Application" in the following sort of window:
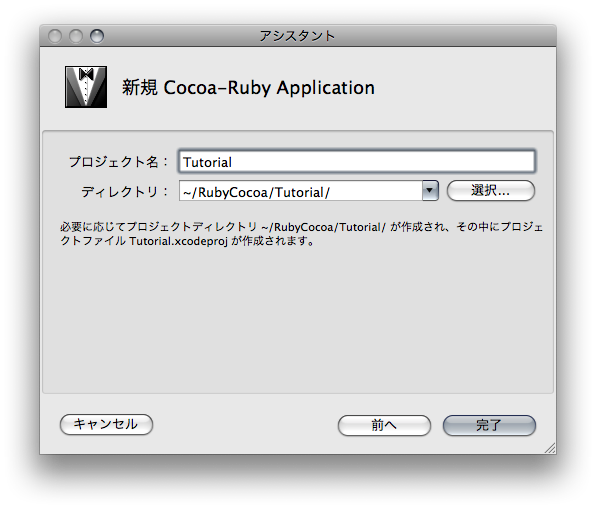
On the next screen give your project the name "Tutorial" and entering ~/RubyCocoa/Tutorial as the directory. In newer versions of XCode you get a separate window where you may indicate the location to save your new Tutorial application.
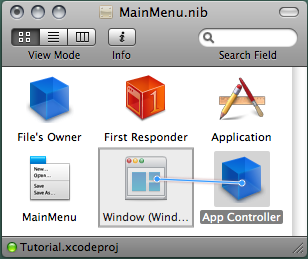
This completes the creation process for the new application and you should get a project window that looks like the image below:
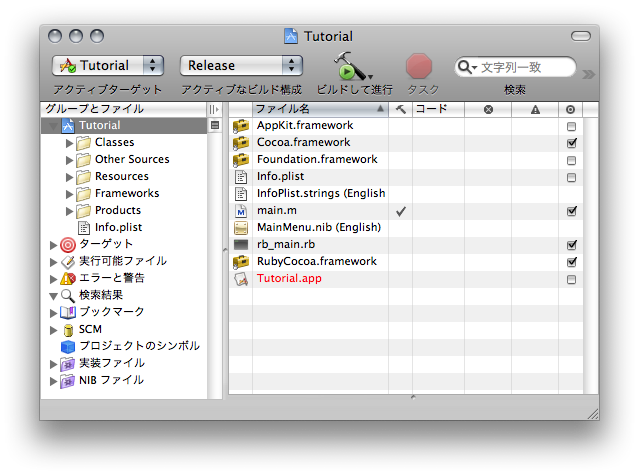
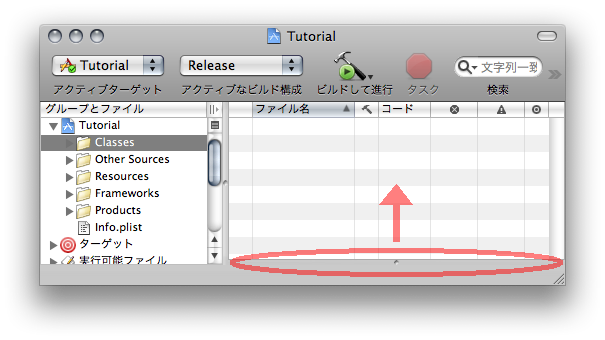
If the code editor pane is not already visible when you create your project, move the notch at the bottom up to split the pane on the right into file view and code editor.
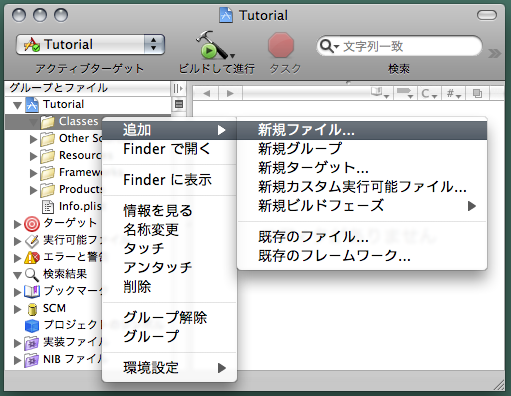
First, let us make the controller that we will work on.
Right click on the Classes folder in the left pane and choose Add→New File...
Under the category of Ruby double-click the Ruby NSObject subclass and in the next window give this file the name "AppController.rb"
Selecting the new AppController.rb confirm that the new class has the following contents (once unnecessary comments have been removed) KML NOTE: the "require 'osx/cocoa'" line I get using XCode 3.1 has also been removed but the application seems to work with or without this line)
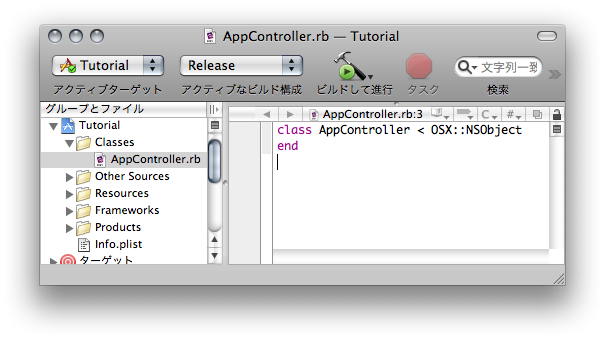
This is the controller class that will we will be working on.
Now, let us get to the code for this new class. Let us add an "ib_outlet" like this:
class AppController < OSX::NSObject
  ib_outlet :window
end
An "outlet," is the Cocoa term of that which is used to refer to other objects. In other words, we are making a connection between the AppController class and the window of the application with this reference.
Next we have make a connection between our new controller class and the user interface.
In the Resources folder of the left pane of the project window double-click on the MainMenu.nib, which will boot the Interface Builder application.
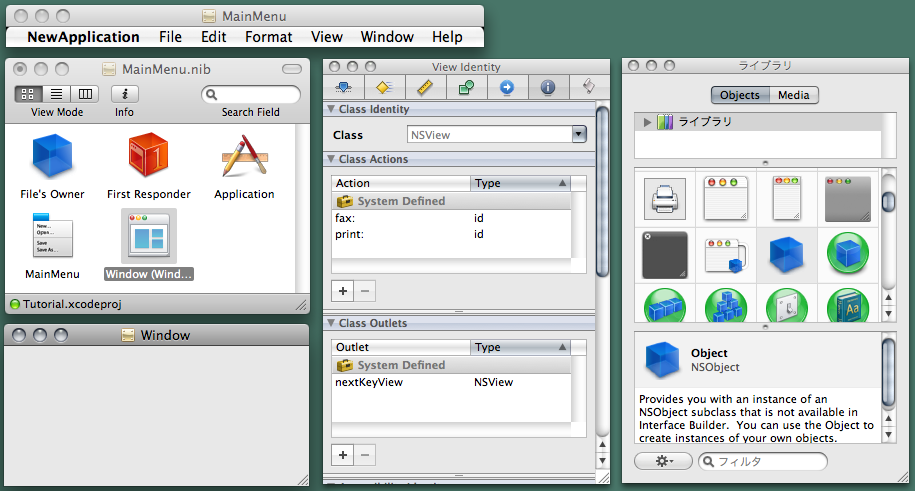
Five windows when the application is opened.
In the library palette scroll down a bit and look for the Object (NSObject).
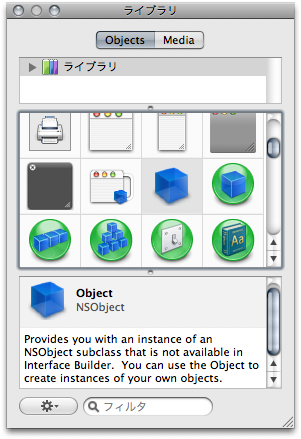
Drag the Object item from the palette and drop it in the main window.
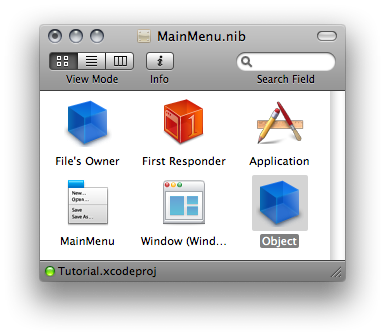
Now we have added this object to the main window. Next select the newly added Object and, in the inspector, show the class tab either by clicking Cmd+6 or choosing the sixth tab to the right with th esmall "i" icon above it. From the list of possible classes you can choose at the top, or by typing it in yourself (it should auto-complete), select AppController for the class of this object.
With this, when the application is run, an instance of the AppController class will be automatically created. We might as well mention that the main window is also automatically generated without any need to write any code.
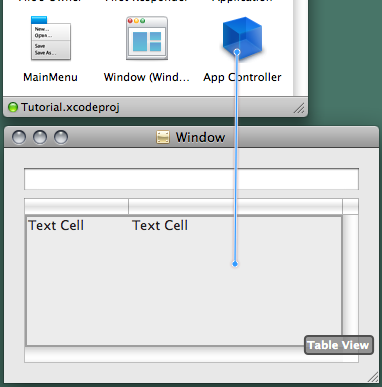
Now let us tie the window outlet of our AppController class to the actual window displayed in interface builder.
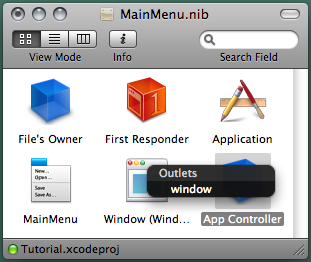
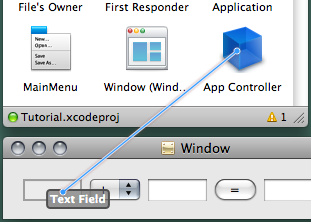
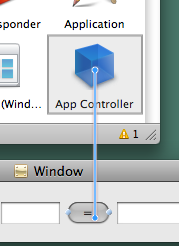
With the main window visible, click on the AppController object with the Ctrl (control) key pressed and drag the blue line which appears over to the window object "Window" and drop it there.
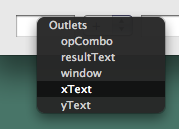
When you do this a small "Outlets" window appears and will allow you to select any ib_outlets you have created. Select the "window" outlet by clicking on it.
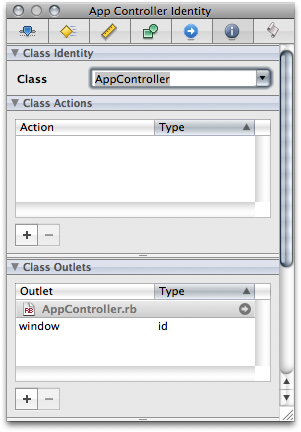
Now their is a reference between the AppController class window outlet and the Window object.
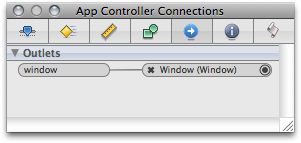
With the AppController object selected, confirm that this has indeed happened by looking at the fifth tab, from the left, of the inspector or pressing Cmd+5. Here you should be able to see the connections for an outlet.
That complets the connection work that needs to be done in Interface Builder. Save your changes and exit out of Interface Builder.
Now let us write some code we want to implement.
We are going to add the awakeFromNib method which gets called immediately after the launch of the application.
class AppController < OSX::NSObject
  ib_outlet :window

  def awakeFromNib
    @window.alphaValue = 0.8
  end
end
As soon as the application has completed launching, the NSApp class will call the awakeFromNib methods for every object. Thus if you want something to happen on launch, this method is a good place to put your actions.
We're done. Let us give it a try. In XCode, press Cmd+R and the application will be run.
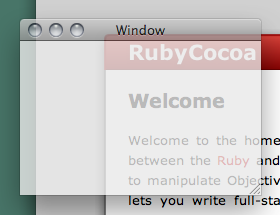
If you get this kind of half transparent window then the tutorial was a success.
Try adjusting the value of @window.alphaValue to see the effect it has on the degree of transparency.
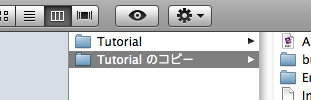
We are going to use the application we just used as a model for some other applications we are going to make so make a duplicate of your project folder.
in the Finder, select your project directory and press Cmd+D to duplicate it.
OSX.require_framework 'QuartzComposer'

class AppController < OSX::NSObject
  include OSX
  ib_outlet :window

  def awakeFromNib
    @window.alphaValue = 0.8
    v = @window.contentView = QCView.alloc.init
    v.loadCompositionFromFile(
      "/Developer/Examples/Quartz Composer/" +
      "Compositions/Graphic Animations/Cube Replicator.qtz"
    )
    v.startRendering
  end
end
For our next application let us make a simple calculator.
In XCode, double click on the MainMenu.nib and it will boot up Interface Builder.
Using the controls you find in the library palette create the following window interface:
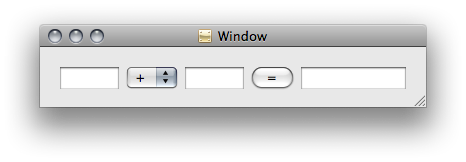
There are three Text Field (NSTextField), with a Pop Up Button (NSPopUpButton) located second from the left and finally second from the right there is a Push Button (NSButton).
If you double-click on the Pop Up Button it will pop up and you can double-click on its menu items in order to edit them. Here you can cut the extra item with Cmd+X and edit the two remaining items with a "+" and a "-". (If you need to add a menu item you can use copy and paste or you can drop a Menu Item (NSMenuItem) on it from the Library palette.
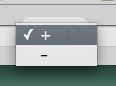
In the same way, double-click on the push button and label it "=."
Now let us leave the Interface Builder and let us add the following outlets and methods.
class AppController < OSX::NSObject
  include OSX
  ib_outlet :window, :xText, :yText, :opCombo, :resultText

  def onCalc(sender)
  end
  ib_action :onCalc
end
Now save and return to Interface Builder.
Select the AppController and holding the Ctrl (control) button down click and drag over to the text field farthest to the left and drop it there.
The outlet window should appear and choose "xText."
Now repeat this process with the pop-up button being attached to "opCombo," the middle text field to "yText" and the text field furthest to the right being tied to "resultText."
Finally, we need to set up the action for the push button.
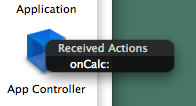
With the push button selected, press the Ctrl (control) button and click and drag it over to the App Controller, dropping it there.
Here the method onCalc which we set up as an ib_action appears. Choose it.
Now, when the button is pushed, the onCalc method will be executed.
This concludes the work we need to do in Interface Builder. Save and exit out of Interface Builder.
Because we want to execute the "onCalc" method, for debugging purposes, let us add a "puts" call.
class AppController < OSX::NSObject
  include OSX
  ib_outlet :window, :xText, :yText, :opCombo, :resultText

  def onCalc(sender)
    puts 'onCalc'
  end
  ib_action :onCalc
end
First, display the XCode console by pressing Cmd+Shift+R. When you run the application and the "=" button is pressed, you can confirm that the "onCalc" method really is being called. Run the application with Cmd+R and confirm that it is. If the method is executed you syhould see that "onCalc" was outputed to the XCode console.
In this way it is possible to use the "puts" and "p" commants to output a log when you are working on the development of your application. It is good to use this feature as you make gradual steps forward.
Next, let us get the value of the text fields. First, let us find out what clasl @xText belongs to.
class AppController < OSX::NSObject
  include OSX
  ib_outlet :window, :xText, :yText, :opCombo, :resultText

  def onCalc(sender)
    p @xText
  end
  ib_action :onCalc
end
If you run this and press the "=" button you will find the following output the run log. We can see from this that it belongs to the "NSTextField" class.
#<OSX::NSTextField:0x273d74 class='NSTextField' id=0x6b0ef0>
Now, let us find out what methods are available to the NSTextField class.
From the main menu of XCode choose Help→Documentation.

If you enter NSTextField into the search field on the right, NSTextField should appear at the top. If you click on this a reference document for that class should appear in the pane below.
Looking through this there doesn't seem to be any way of getting a line of text so lets look at the NSControl class by clicking on it in the "Inherits from" box.
If you look through this you should see that in the "Setting the control's value" section there is a "stringValue" method listed there.
class AppController < OSX::NSObject
  include OSX
  ib_outlet :window, :xText, :yText, :opCombo, :resultText

  def onCalc(sender)
    p @xText.stringValue
  end
  ib_action :onCalc
end
If you run the application with the above edits, we see that we have gotten an NSCFString class object.
#<OSX::NSCFString:0x273482 class='NSCFString' id=0xa080f988>
NSCFString is another name for NSString and it is the string class for Cocoa。 If you call NSString.to_s you can convert this into a Ruby string. Let us give this a try:
class AppController < OSX::NSObject
  include OSX
  ib_outlet :window, :xText, :yText, :opCombo, :resultText

  def onCalc(sender)
    p @xText.stringValue.to_s
  end
  ib_action :onCalc
end
""
Now we can see that we got a Ruby string. It is blank because nothing has been entered into the text field on the left, but if you put something in the field and press the "=" button you will see that this string is displayed correctly.
Now let us look at the way of setting the string for the final @resultText showing the result of the calculation.
Because @resultText, like @xText, is a NSTextField using the XCode help files let us look for a method to set it.
Looking through the documentation for NSTextField there doesn't seem to be anything so again we'll look at NSControl. You should be able to find that there is a method called "setStringValue."
class AppController < OSX::NSObject
  include OSX
  ib_outlet :window, :xText, :yText, :opCombo, :resultText

  def onCalc(sender)
    @resultText.setStringValue('abc')
  end
  ib_action :onCalc
end
If you change the code to this, run the application and press the "=" button you should see that "abc" was put in the text field to the right. Give it a try.
In this way when Ruby objects (引数に渡す ?) to Cocoa methods, whenever possible it automatically converts into Cocoa classes. In this case, there is an automatic internal conversion from String → NSString going on.
Now we want to look for a way of getting the selected item of the combo box so let us us the "p" method on @opCombo and look into it.
class AppController < OSX::NSObject
  include OSX
  ib_outlet :window, :xText, :yText, :opCombo, :resultText

  def onCalc(sender)
    p @opCombo.selectedItem.title.to_s
  end
  ib_action :onCalc
end
As a result of this check and using the documentation we can see that using the above code will get us the text of the selected item.
Now that we know how to get the values and set the result, let us try writing the actual code. Using what you have learned so far you should be able to write something like the code below:
class AppController < OSX::NSObject
  include OSX
  ib_outlet :window, :xText, :yText, :opCombo, :resultText

  def onCalc(sender)
    x = @xText.stringValue.to_s.to_f
    y = @yText.stringValue.to_s.to_f
    case @opCombo.selectedItem.title.to_s
      when '+'; r = x + y
      when '-'; r = x - y
    end
    @resultText.setStringValue(r)
  end
  ib_action :onCalc
end
This completes the calculator application. Run the application and give it a try. If you have time, modify the application to also support multiplication and division.
Up to this point we have only used relatively simple controls and studied only the basics but now lets use NSTableView and try to make a more practical application which conducts incremental searches of the desktop.
Let's begin with a duplicate of the original tutorial project.
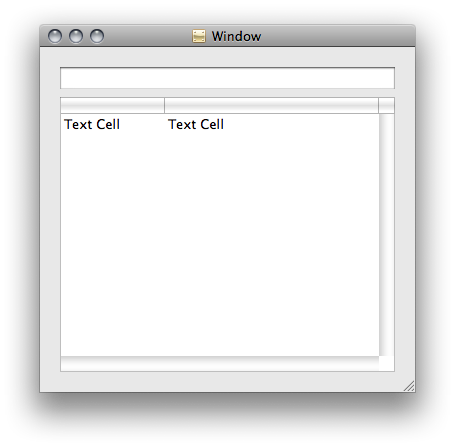
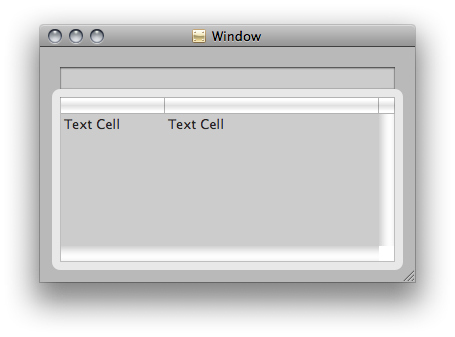
Double click on MainMenu.nib, which will boot InterfaceBuilder. Drag controls into the main window from the library in order to create a window that looks like the one below. It consists of s Text Field (NSTextField) and a Table View (NSScrollView).
At this point leave interface builder, and add the outlets into the code as follows:
class AppController < OSX::NSObject
  include OSX
  ib_outlet :window, :text, :table
end
Now, we return to the interface builder and connect the outlets.
Just as we did before, connect "Text Field" and "text," "Table View" and "table."
When you connect the Table View move the cursor to the interior of the table and release it when Table View is visible. Be careful not to connect to the "Scroll View" or the "Table Column."
Now, draggin from the Text Field with the Ctrl (control) key down, drag to the AppController and connect it to the "delegate" outlet. Once this is connected, any changes in the text field will be communicated to the AppController.
Select the Table View and press Cmd+1, opening the inspector. Note that the title of the inspector is "Scroll View Attributes" instead of "Table View Attributes."
If you double-click on the table in that state, it should look like the image below, and the title of the inspector should change to "Table View Attributes."
In that state Ctrl click and drag from the Table View and connect it to the AppController, selecting "dataSource."
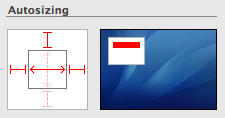
Next, select the Text Field, press Cmd+3 to open the "Size" inspector. Clicking in the applicable places, adjust the settings to correspond to the image below.
Also, select the Table View and, once again pressing Cmd+3, set it to correspond to the below image.
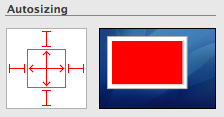
If you adjust the settings in this way, when the window is resized, the location and size of the controls will be preserved as needed.
Now, we are done with our configurations and Interval Builder. Save your changes and exit the application.
Next, edit the code for the controllers to match the text below.
class AppController < OSX::NSObject
  include OSX
  ib_outlet :window, :text, :table

  # NSTextField delegate

  def controlTextDidChange(note)
    puts 'textChanged: ' + @text.stringValue.to_s
  end

  # NSTableView dataSource

  def numberOfRowsInTableView(sender)
    3
  end

  def tableView_objectValueForTableColumn_row(sender, col, row)
    'abc'
  end
end
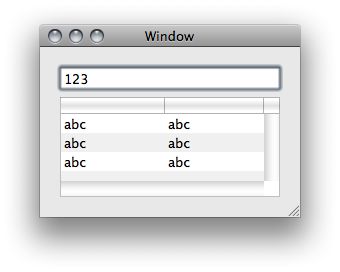
If the contents of the text field is changed then contextTextDidChange will be called.
The numberOfRowsInTableView and tableView_objectValueForTableColumn_row methods are both methods that interface with the dataSource of the NSTableview and return the various lines of data (row,column). You can confirm this in the XCode documentation for NSTableDataSource under the entries for numberOfRowsInTableView: and tableView:objectValueForTableColumn:row:.
On the basis of the information that is returned, you can display it in the NSTableView. (To put it MVC, NSTableView is V, and the AppController is C).
If you run by pressing Cmd+R and edit the contents of the Text Field, controlTextDidChange gets called and three lines appear in the Table View with "abc."
Now, let us eliminate problems one at a time.
First of all, in order to get the path to the desktop it would appear we can use NSString#stringByExpandingTildeInPath (confirm this in the documentation). If you follow the code below you can get the absolute path to the Desktop. (Of course, you can also use File.expand_path)
d = NSString.stringWithString('~/Desktop')
d = d.stringByExpandingTildeInPath.to_s
Also, it would seem that in order to search for files by keyword under the Desktop hierarchy, you can use the following. Try this from within the awakeFromNib
d = NSString.stringWithString('~/Desktop')
d = d.stringByExpandingTildeInPath.to_s

keyword = 'ruby'
items = Dir::glob(d + "/**/*#{keyword}*", File::FNM_CASEFOLD)
p items
Moving on, the code for searching for a file by field name that includes the string in the text field is as follows. It also separates the file name from the Desktop and sorts them in a case insensitive way.
d = NSString.stringWithString('~/Desktop')
d = d.stringByExpandingTildeInPath.to_s

s = @text.stringValue.to_s
@items = Dir::glob(d + "/**/*#{s}*", File::FNM_CASEFOLD).map do |i|
  [File.basename(i), File.dirname(i)]
end
@items.sort! {|a,b| a[0].upcase <=> b[0].upcase }
Now, in order to do an incremental search, because we want the action to be executed everytime the contents of the text field changes, the cod eabove needs to be executed within the controlTextDidChange method. Also, we have to get that information to display in the Table View.
The key point is that when the data is refreshed, the @table.reloadData is called and the table is redrawn.
class AppController < OSX::NSObject
  include OSX
  ib_outlet :window, :text, :table

  def initialize
    @items = []
  end

  # NSTextField delegate

  def controlTextDidChange(note)
    s = @text.stringValue.to_s
    d = NSString.stringWithString('~/Desktop')
    d = d.stringByExpandingTildeInPath.to_s
    @items = Dir::glob(d + "/**/*#{s}*", File::FNM_CASEFOLD).map do |i|
      [File.basename(i), File.dirname(i)]
    end
    @items.sort! {|a,b| a[0].upcase <=> b[0].upcase }
    @table.reloadData
  end

  # NSTableView dataSource

  def numberOfRowsInTableView(sender)
    @items.length
  end

  def tableView_objectValueForTableColumn_row(sender, col, row)
    if col == @table.tableColumns.to_a[0]
      @items[row][0]
    else
      @items[row][1]
    end
  end
end
That brings us just about to completion. Trying running the application.
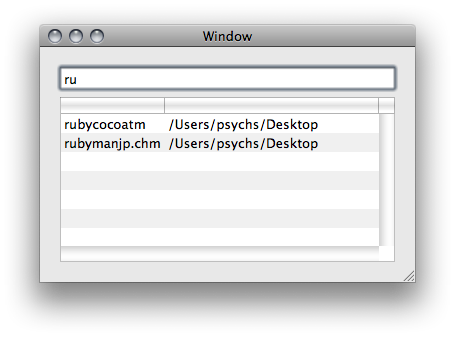
Here we can see that incremental search for files that are located on the desktop is set up.
However, it would be more convenient if all files were shown just after running so lets add some code to awakeFromNib.
class AppController < OSX::NSObject
  include OSX
  ib_outlet :window, :text, :table

  def initialize
    @items = []
  end

  def awakeFromNib
    controlTextDidChange(self)
  end

  # NSTextField delegate

  def controlTextDidChange(note)
    s = @text.stringValue.to_s
    d = NSString.stringWithString('~/Desktop')
    d = d.stringByExpandingTildeInPath.to_s
    @items = Dir::glob(d + "/**/*#{s}*", File::FNM_CASEFOLD).map do |i|
      [File.basename(i), File.dirname(i)]
    end
    @items.sort! {|a,b| a[0].upcase <=> b[0].upcase }
    @table.reloadData
  end

  # NSTableView dataSource

  def numberOfRowsInTableView(sender)
    @items.length
  end

  def tableView_objectValueForTableColumn_row(sender, col, row)
    if col == @table.tableColumns.to_a[0]
      @items[row][0]
    else
      @items[row][1]
    end
  end
end
With this you have completed the development of the Desktop incremental search application.
require 'cgi'
require 'open-uri'
OSX.require_framework 'WebKit'

class AppController < OSX::NSObject
  include OSX
  ib_outlet :window, :text, :table, :webview

  def initialize
    @items = []
  end

  def textEntered(sender)
    s = @text.stringValue.to_s
    @items = search_on_google(s)
    @table.reloadData
  end

  # NSTableView dataSource

  def numberOfRowsInTableView(sender)
    @items.length
  end

  def tableView_objectValueForTableColumn_row(sender, col, row)
    if col == @table.tableColumns.to_a[0]
      @items[row][0]
    else
      @items[row][1]
    end
  end

  # NSTableView delegate

  def tableViewSelectionDidChange(note)
    sel = @table.selectedRow
    return if sel < 0
    url = @items[sel][0]
    u = NSURL.URLWithString(url)
    req = NSURLRequest.requestWithURL(u)
    @webview.mainFrame.loadRequest(req)
  end

  private

  def search_on_google(words)
    q = CGI.escape(words)
    url = "http://www.google.com/search?num=20&ie=UTF-8&oe=UTF-8&q=#{q}"
    res = ''
    open(url) {|f| res = f.read }
    if res
      items = res.scan(/<a href="([^\"]+)" class=l>(.+?)<\/a>/)
      items.map do |i|
        url,title = i
        url = CGI.unescapeHTML(url)
        title = title.gsub(/<\/?b>/, '')    # cut off <b> and </b>
        title = CGI.unescapeHTML(title)
        [url, title]
      end
    else
      []
    end
  end

endThe above tutorials were brief but we created several applications as an introduction to RubyCocoa.
We didn't get into the details of the relationship between Ruby and Objective-C but I believe you can deepen your understanding if you read the RubyCocoa wiki (Japanese), the RubyCocoa programming page (Japanese), and the reference page (Japanese).
Translators Note:
This rough and sometimes abbreviated translation of Satoshi Nakagawa's tutorials is by Konrad M. Lawson, with a few small modifications of content here and here. Thanks to Satoshi Nakagawa for posting these clear examples and his other work on RubyCocoa. -KML
The original Japanese version of this document can be found here:
http://limechat.net/rubycocoa/tutorial/
