Do you want to have a nice “Check for Updates…” feature in your new application without having to code it yourself? The Sparkle module provides a wonderful and free way of implementing this in your application.
This tutorial is essentially a modified version of the tutorial I created for using the Sparkle updates module on my Applescript Studio weblog. The steps for getting a nice “Check Updates…” feature in your RubyCocoa application using Sparkle are pretty much the same with one small change that seems to be specific to the current version of Sparkle.
The tuturial below should technically also work for MacRuby but, unlike RubyCocoa, MacRuby requires GC (Garbage Collection). There is a GC version of Sparkle which came with the release I used but it does not appear to be functional. When it does work, you’ll be able to follow the steps below with one modification in step 2, which is noted below.
1. First download the Sparkle module from its homepage. This tutorial uses Sparkle 1.5b1 and XCode 3.1.
2. This step will differ depending on whether you are using RubyCocoa or MacRuby (0.2 as of this tutorial):
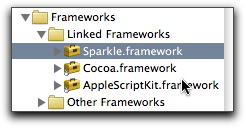
RubyCocoa: Simple drag the Sparkle.framework inside the downloaded Sparkle folder into your XCode application into the folder “Linked Frameworks” of the “Frameworks” folder.
MacRuby: You need to use the “Sparkle-with-GC.framework” version of the framework and rename this to “Sparkle.framework” (after renaming or moving the original) before continuing with the steps below. NOTE: due to a problem with the current 1.5 beta release of Sparkle, this does not work yet. Let me know if you get it working with MacRuby in a future Sparkle release and I’ll note that here.
You should now see it in your linked frameworks folder.
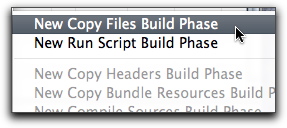
3. Now, from the “Project” menu of XCode, choose “New Copy Files Build Phase” from the “New Build Phase” menu item.
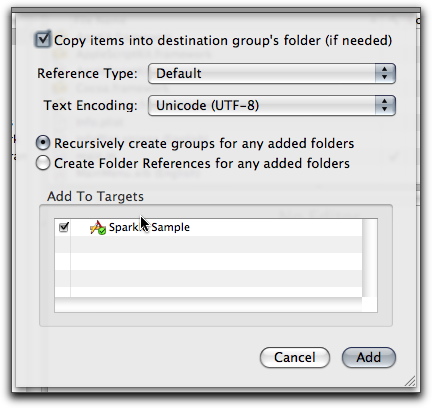
A new window will appear looking like this:
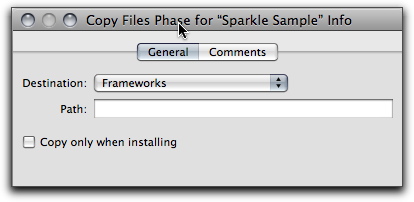
NOTE: Make sure this says “Frameworks” and not “Resources” in order to prevent a potential build error.
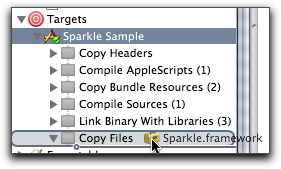
4. Now, drag the Sparkle.framework from the “Linked Frameworks” folder and drop it onto the newly created “Copy Files” build phase listed under your application in the “Targets” section of your project.
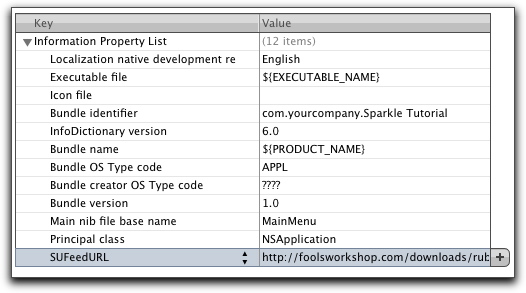
5. Now in the Info.plist file of your project in XCode, you need to add a new key. This will designate a link to the RSS file you will eventually create, called an “AppCast” which will contain the information about updates to the application. For example:
<key>SUFeedURL</key>
<string>http://foolsworkshop.com/downloads/sparklesample.xml</string>
In my version of XCode, you no longer have to enter this by hand coding the xml, and instead you simply click the “+” simple on the last visible key in the plist and enter in SUFeedURL in the first field and the URL in the second field. When you are done the added key at the bottom should look something this:
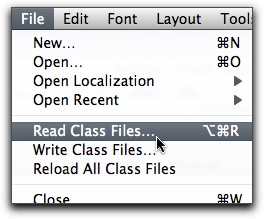
6. Now switch to the “Interface Builder” application and your “MainMenu.nib” file (open it from the “Resources” folder of your XCode project if it is not open.
From the File menu choose “Read Class Files”
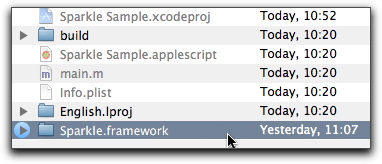
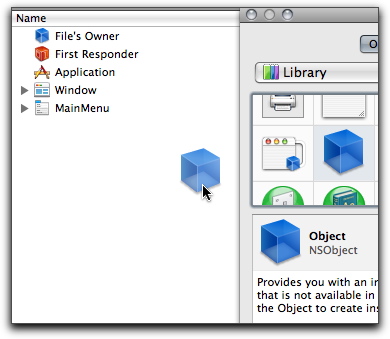
Navigate to your folder and you should see the Sparkle.framework folder and inside that the “Headers” folder (or actually an alias to the folder, which is deep in the “Versions” folder). Select all the files in the “Headers” folder and add them.
7. Once you have added the class header files from Sparkle, add an “NSObject” which looks like a blue box from the library panel into the list of files in your MainMenu.nib.
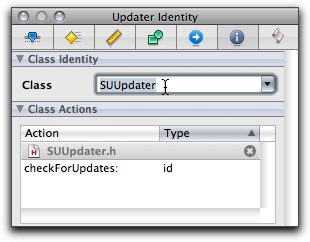
8. Click on this object and in the “Information” tab looking like a white “I” on a blue circle, type “SUUpdater” into the “Class” field (it should auto complete if you read the class files correctly) and press enter. This will add the required Class Actions in the panel below it.
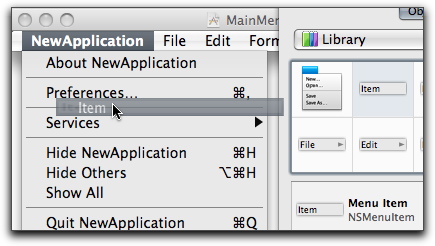
9. Now create your “Check for Updates…” menu item in the application menu by dragging an NSMenuItem into the appropriate place. After you add it, you can change the “Title” of your menu in the inspector in the first tab.
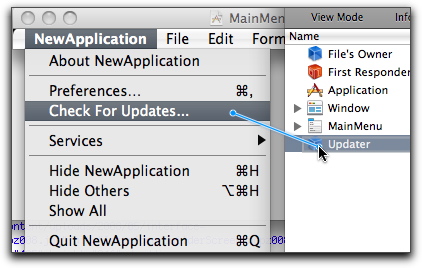
10. Now, you need to connect this menu to the new Sparkle object you created. Control-click on the menu item and a blue line will appear. Drag this line and drop it on the “Updater” object.
11. Everything you need to do in the project is set up. However, you still need to set up an AppCast RSS file. There is a sample of one in the Sparkle documentation PDF and also you can download the test file used found in the Demo application. I created my AppCast RSS file using the RSS application Feeder which actually has a template for creating Sparkle RSS files (if you use this, consider editing the template and turning on the extra field for “Release info”). The important things that must be included in your AppCast RSS feed are a link to the Sparkle namespace:
xmlns:sparkle="http://www.andymatuschak.org/xml-namespaces/sparkle"
You then add a new RSS item each time you make a new update, and include an enclosure linking to your new release, which the documentation says should be named something like “Application Name App_2.0.zip”
Here is what my RSS feed looks like after I created it with the Sparkle template in Feeder. Some of these things are optional lines or extra information added by Feeder itself, but it should give you an idea of how this works:
<?xml version="1.0" encoding="utf-8"?>
<rss xmlns:atom="http://www.w3.org/2005/Atom" xmlns:sparkle="http://www.andymatuschak.org/xml-namespaces/sparkle" version="2.0">
  <channel>
    <title>Sparkle Sample</title>
    <link>http://foolsworkshop.com/downloads/rubycocoasparkle.xml</link>
    <description>A simple example AppCast for Sparkle</description>
    <generator>Feeder 1.5.3(378) http://reinventedsoftware.com/feeder/</generator>
    <docs>http://blogs.law.harvard.edu/tech/rss</docs>
    <language>en</language>
    <pubDate>Fri, 30 May 2008 11:35:15 +0900</pubDate>
    <lastBuildDate>Fri, 30 May 2008 11:35:15 +0900</lastBuildDate>
    <atom:link href="http://foolsworkshop.com/downloads/rubycocoasparkle.xml" rel="self" type="application/rss+xml"/>
    <item>
      <title>Version 2.0 (No useful changes, upgrade for $100)</title>
      <pubDate>Sun, 01 Jun 2008 11:24:54 +0900</pubDate>
      <enclosure url="http://foolsworkshop.com/downloads/RubyCocoa Sparkle Tutorial_2.0.zip" length="561575" type="application/octet-stream" sparkle:version="2.0"/>
      <guid isPermaLink="false">version-20-no-useful-changes-upgrade-for-$100</guid>
      <sparkle:releaseNotesLink>http://foolsworkshop.com/downloads/sparklesample.html</sparkle:releaseNotesLink>
    </item>
  </channel>
</rss>
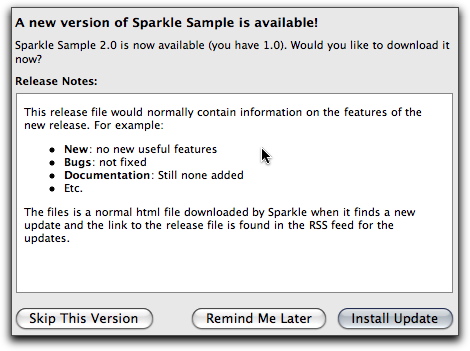
12. In addition to the RSS file (in this case rubycocoasparkle.xml), you might also want to post some release notes on the new version, which you can see in the above RSS is linked with the “sparkle:releaseNotesLink” tag. If such a file exists, Sparkle will display this file, which is regular HTML, when a new update is found.
You can try all this and play with a sample application here:
RubyCocoa Sparkle Sample Project
Building this application and running should give you a chance to see how Sparkle works, as I have posted a “fake” 2.0 update. Note that the built application is labelled as “2.0″ in the Finder if you choose “Get Info” after downloading the update.
There was no need to enter in any ruby code anywhere in order to make this work in its most basic form. To recap the steps are roughly as follows:
1. Add the framework to your project and follow the steps in Interface Builder above (steps 1-10)
2. Create an RSS feed (in my case rubycocoasparkle.xml) to announce new releases (step 11).
3. Create an HTML file for release notes so people know what they are getting (step 12).
6 Comments
Ooh I look forward to using this tutorial one day
Great! I am just glad it might be useful to someone!
Regarding Sparkle-with-GC.framework, I got a quick response from the author, who told me that 1.5b was wrongly generated and doesn’t contain a GC-capable framework. On the other side it is possible to get the latest source of Sparkle using bzr and build it for GC, and it should work.
http://andymatuschak.org/articles/2008/06/01/a-guide-to-contributing-to-sparkle/
(Or, we can wait for the next release :))
Great, I look forward to seeing 1.5 come out of beta.
Thanks for this article. I never thought it would be that easy or fun to get Sparkle updates working in my app.
1.5b2 fixes the GC problem I think (haven’t tested it). See http://andymatuschak.org/articles/2008/06/29/sparkle-15b2/
Quote: “Made the dual-mode build configuration actually use the .xcconfig which builds it with GC support. (oops!)”
Post a Comment